Make A Smarty Slouchy Bag
UPDATE: Maker’s notes. Kayleigh has made this in the blue with the dark blue Mariposa cotton (we’ll keep it in the shop if you’d like to see it but a couple of photos are below before we get to the pattern.) The handle length was reduced by 20cm to make it more underarm and to suit Kayleigh’s height. It was sown with stitch length 3, but Kayleigh would recommend 3.5 for the topstitching. No special needle or foot used, it was in Kayleigh’s words “bog standard sewing on a bog standard machine”. The faux leather sewed beautifully.
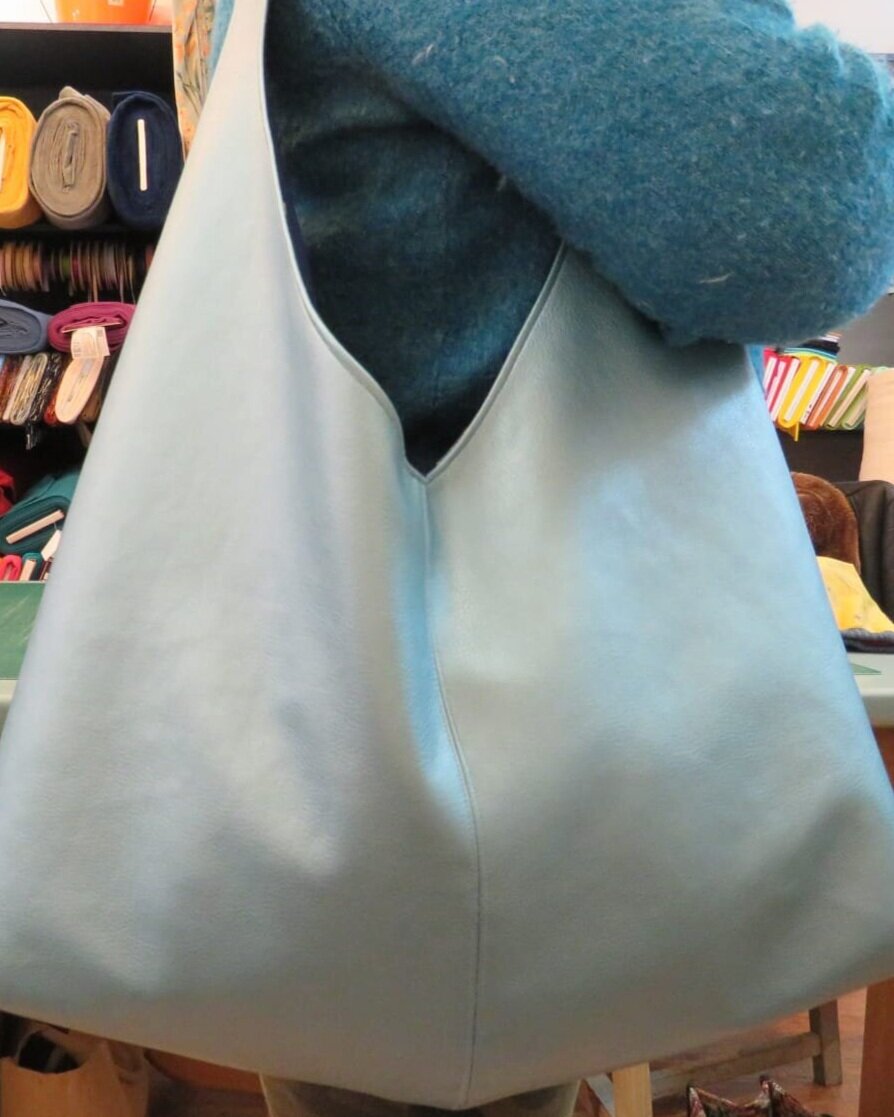


Would you like to make this lovely Slouchy Bag? We think it looks really smart. The pattern and instructions are designed to work with our faux leather. We’re sharing the images and instructions here by kind permission of Modern Sewing Starts Here Magazine.
The faux leather used has a woven fabric backing, which sews really well with a normal machine foot. You might find it easier to sew with a Teflon foot or a walking foot but you should be fine with this product. The writer of this pattern suggests you make sure you increase your stitch length a little to avoid stressing the faux leather at the seams.
You will need:
60 cm of 140 cm wide faux leather
85 cm of 115 cm wide cotton fabric for lining
1 magnetic clasp, either sew on or push through
Light weight iron-on interfacing, small amount around 7.5 cm (3 in) x 3.5 cm (1 ½ in)
Matching thread and contrasting thread for topstitching
Paper for pattern at least 85cm (34 in) x 70cm (24 in)
Note: we have made our faux leathers available by the 60cm so you don’t buy more than you need. A metre of any of the quilting weight cottons will be fine but please say if you would like us to cut you 85cm. The clasp is on our Haberdashery page, and if you need threads we can match for you.
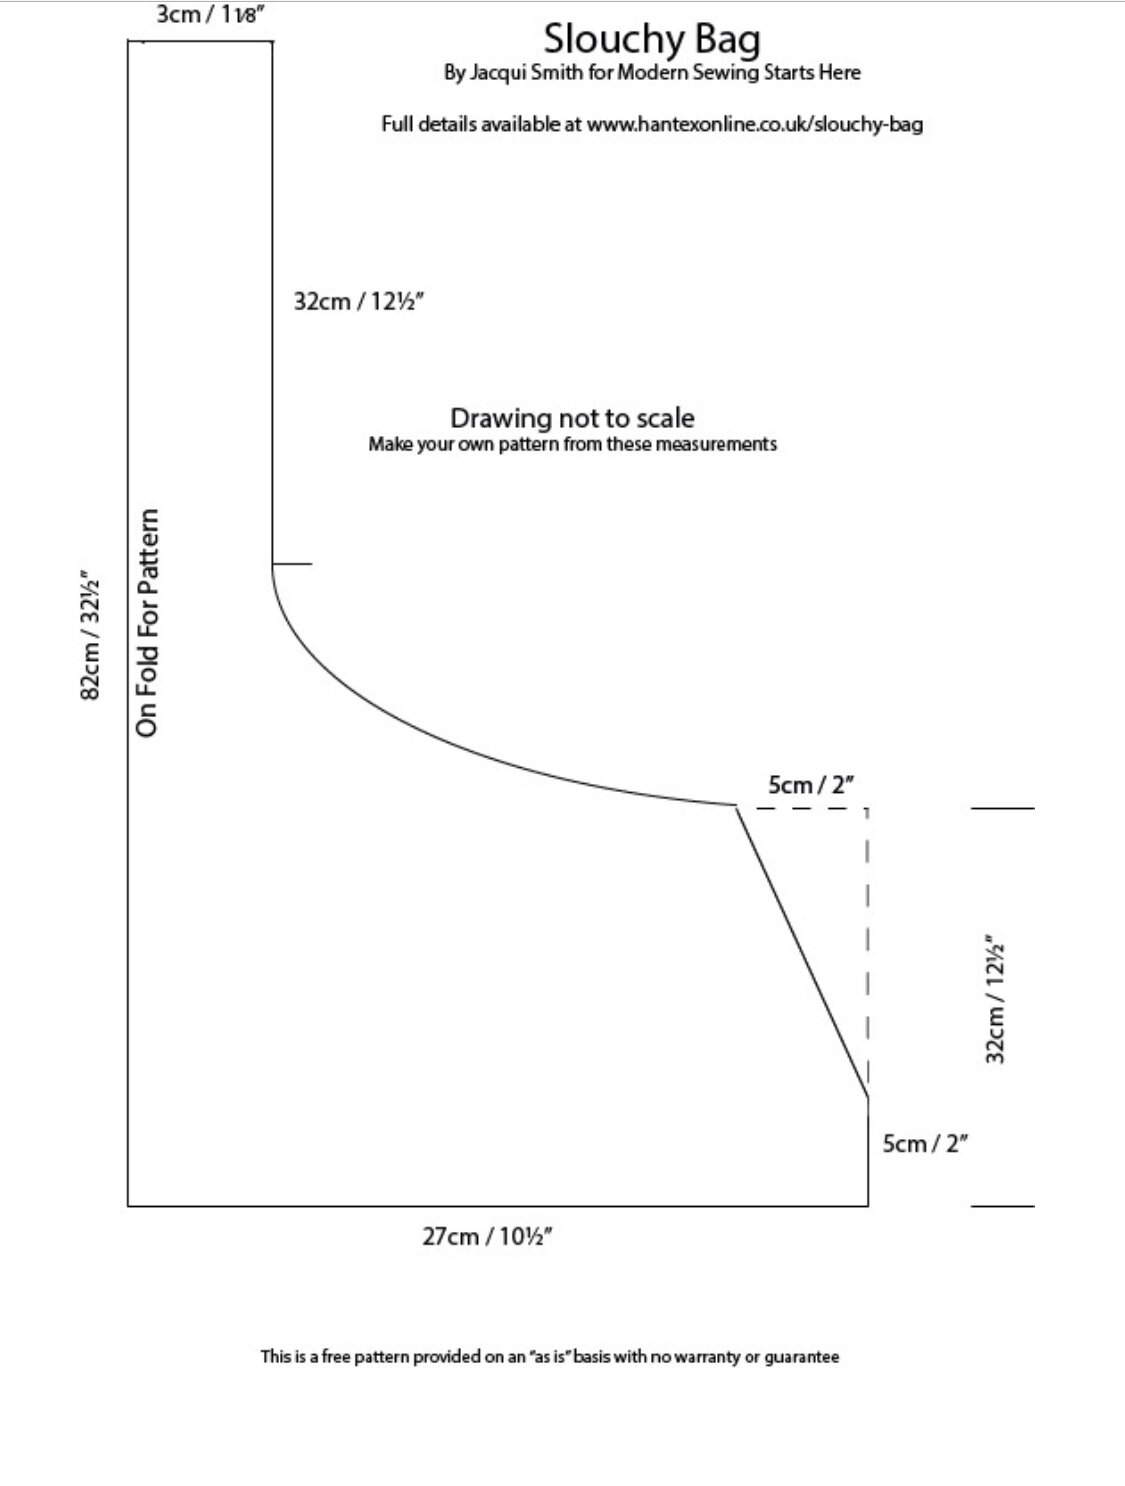
To make the pattern:
Fold paper in half to make 85cm x 30cm (34 in x 12 in)
Draw out the pattern as per measurements on the diagram shown with the long straight side against the fold. Cut out and open up to make the pattern.
Method:
1. Place both bag pieces in faux leather right sides together, and sew the centre front and back seams.
2. Open out the seams, and topstitch from the right side of the fabric as desired. The writer of these instrucions did two rows quite close together on both sides of the seam in a contrasting colour.
3. With lining pieces right sides together sew the centre back seam. Open out seam and press.
4. Make pocket by folding the square in half, right sides together to make a rectangle 25cm x 11cm (9¾in x 4½in), sew along both the short edges. Trim corners and turn right way out.
5. Using a quilting ruler mark the placement for the internal pocket on the right side of the bag lining. Mark a line at right angles to the centre back seam 16cm (6¼in) down from the top edge, 12cm (4½in) to each side of the centre seam using a chalk marker.
6. Place the pocket with the raw edge to the chalk line with the pocket facing downwards.
7. Sew from one side of the pocket to the other with a 1cm seam, backstitching at each end to secure the seam. Fold and press the pocket upwards.
8. Stitch along both sides of the pocket and along the bottom to secure in place, you may also wish to sew a divider half way along the pocket to make two smaller pockets.
9. With right sides together sew the centre front seam of the bag lining.
10. Fold the bag outer faux leather right sides together with the centre front and centre back seams matching. Sew the bottom of the bag. Repeat for the bag lining but this time leaving a gap open on one side of the centre seam of around 10cm (4in) to turn the bag through when the lining has been sewn into it.
11. You now need to ‘bag’ the bottom of the bag to make the shaping. To do this take the bag outer and firstly trim the corner off both ends of the bottom seam. Then fold the corner right sides together so that the seam on the bottom matches the side of the bag, this should make a triangle with the bottom seam along the centre.


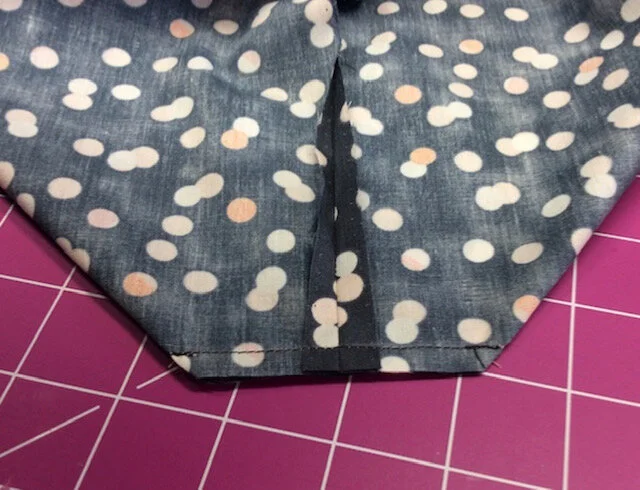
12. Using a quilting ruler make a line across the triangle at right angles to the bottom seam so that it is 3.5cm (1½in) on either side of the seam. Sew across this line securing the stitching at both ends. Trim the triangle off leaving a 1cm (⅜in) seam allowance. Repeat this step for all corners of the leather and lining.
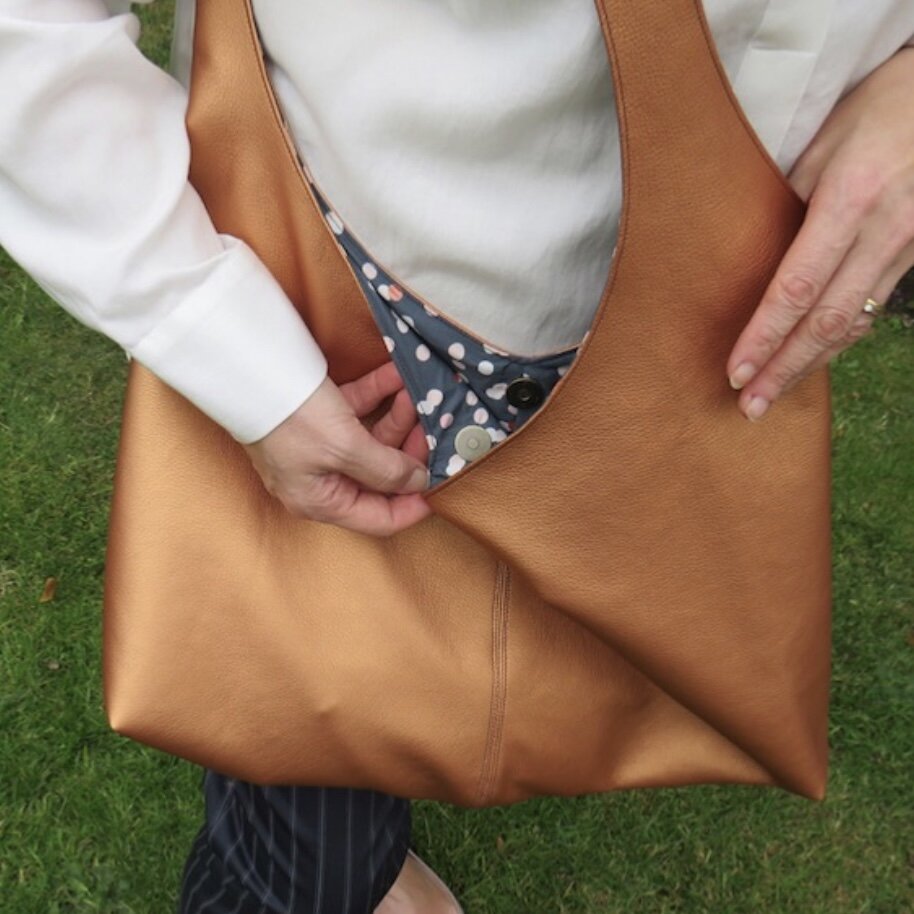
13. Cut the iron on interfacing in half to make two small squares. Fuse these to the wrong side of the lining across the centre front and back seams approx 2cm (¾in) down from the top edge. This will provide support for the magnetic clasps. Fix the clasps onto the right side of the bag lining over the seam over the interfaced square. Make sure that they are both an equal distance from the top edge of the bag.

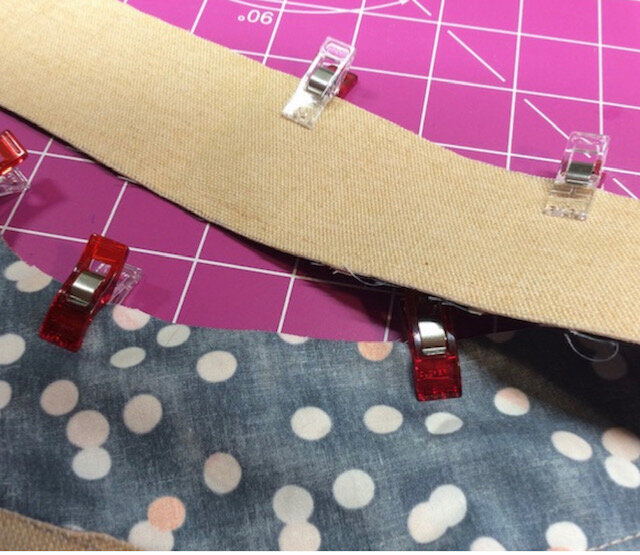
14. Turn faux leather outer of bag inside out and place the lining inside it with right sides facing. Matching centre front and back seams, clip edges together with clips front the top of each handle right across to the top of the other handle. Sew the bag and lining together.
15. Clip the seam allowance around the curves and turn the bag to the right sides through the opening in the lining. Topstitch edges as desired.
16. Sew the tops of the handles together by sewing them right sides together around 4cm (1 ½in) from the ends of the handles. Trim one handle seam allowance to approx 1cm (⅜ in). Fold the other seam allowance in half to put the raw edge inside and topstitch across the handle to secure. Your bag is now finished...enjoy!